hello scrappy friends!
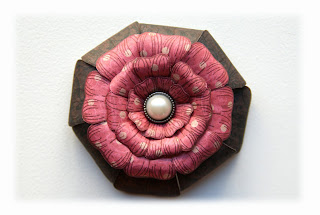
as i promised i'm sharing a little tutorial on how i made the big blossom for my latest hearfelt creations.
here is a list of what you will need to make such flowers:
brown ink pad
stickles diamond glitter glue
pearl brads
3d foam tape
double sided adhesive tape
step 1: stamps one of each of the 4 different floral designs {i didn't use the biggest stamp for this blossom}; 3 of them should be on pink pattern paper and the largest one - on brownish pattern paper; cut them out and separate the individual petals;
step 2: curl the petals down {i used my pencil for the large flowers and a barbecue stick for the smaller ones - i'm sure that there are better tools, but just didn't have anything at home}; your petals will look like this when you are done shaping them:
step 3: turn your flowers around and start attaching the double sided adhesive tape {one small piece in the middle} and the 3d foam squares under the petals; add two-three layers of foam tape under the petals, if necessary, to achieve the desired dimension;
step 4: take your pearl brad, push it through the hole in the florals center and attach it on the back side; you blossom should look like this now:
step 5: add some glitter glue and your flower is complete!
the whole process doesn't take more than 10 minutes and the effect is stunning!
i hope this tutorial was useful to you!
keep creating!
hugs 'n smiles,
Emmy


3 comments:
thanks for sharing how you made the flowers for the "she" layout! Very pretty!
what a wonerful LO and the flowers are divine
hugs
Great tutorial! I haven's made any flowers yet (I have been too busy using my Copic markers) so I am trying to get ideas on how you ladies make such beautiful flowers. Thanks!
Post a Comment