Wednesday, August 7

paper flowers using GELATOS and tissue paper {FABER-CASTELL}

hello craft friends!

last month i posted a sneak peek of my paper flowers tutorial i created for FABER-CASTELL design memory craft. and today i'm going to share the complete post here on my blog.

how to make flowers using tissue paper and design memory craft GELATOS®.

 i really love using tissue papers on my projects, but the colors i like are very difficult to find. that's why i decided to create my own tailor-made coloured tissue paper using design memory craft GELATOS®


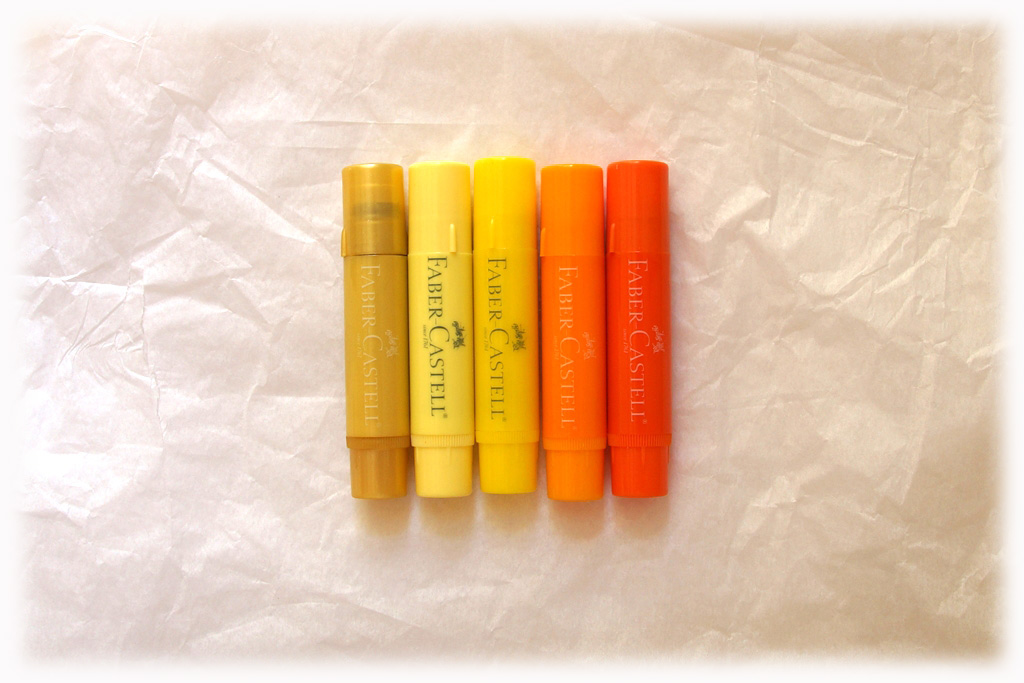
step 1: get some white tissue paper and choose the colors you would like to use. for my card i used butter cream, lemon, mango, tangerine and gold champagne.


 step 2: using the design memory craft GELATOS® colours cover the tissue paper sheets. to create the watercolor effect use the water brush from the GELATOS® tools Set (#770312). the final result is lovely tissue papers in bright colors


 step 3: cut out flowers using a cutting die or a punch. i used SPELLBINDERS' rose creations sheapabilities die.


step 4: assemble the paper tissue blossoms. i used 4 layers of each size and adhered them with glue dots. when ready i crumpled the petals to give them a distressed look and to cover the central part. 


step 5: the card base - i used white cardstock 15 x 30 cm, which I folded in two. i covered the background with a mixture of snow cone, cotton candy and boysenberry blue GELATOS® and i blended them with water. when it was dry i drew the frame using PITT® Artist Pen brown.


  used a few layers of GESSO with THE CRAFTER'S WORKSHOP masking template to create additional pattern on my background.

step 6: using JUST RITE "just keep calm" clear stamps set and the stamper's big brush 3 ct. NEUTRAL (#770054) i stamped my sentiment on a white cardstock. i coloured the frame with gold champagne GELATO®.


 to finish off my design i added a few die cut leaves, colored with green GELATOS® .


i hope you enjoyed my short tutorial!

have a crafty day!

hugs 'n smiles,


Tuesday, August 6

LOVE {merly impressions}

hello scrappy friends! 

i can finally share an amazing NEWS with you: i've been invited to join the amazing team at MERLY IMPRESSIONS - the UK specialists in KAISERCRAFT products.


joining the MERLY IMPRESSIONS' team is a dream come true! i love playing with KAISERCRAFT’s gorgeous products and i hope that i will be able to inspire you with my monthly posts.

and here is my first project as a design team member - 

"LOVE"


for my background i used the double-sided wisteria paper. i added extra dimension with modeling paste and a masking template.


i fussy cut the dragonflies from the puce gloss paper and adhered them with mounting foam tape to my background to create a 3d effect. then i stamped on some of the paper layers, using the matching clear stamp set.


i created the layers under my picture using different pattern papers – amethyst, orchid, and some of the die-cut cardstock shapes from the lavendar haze collectables pack.


to finish off my page i added rhinestones aqua and inked the edges of the different layers with KAISERCRAFT black mini ink pad.


here is a list of some of the products i used on my layout:

i hope you enjoyed today's post!

have a great day!

hugs 'n smiles,
Emmy


Friday, August 2

frog dog studio august kit + guest designer

hello scrappy friends!

i've got a wonderful new to share - the amazingly talented TINA WALKER has invited me to be Guest Designer for her FROG DOG STUDIO mixed media AUGUST 2013 kit


it includes: 
ARTchix ephemera sheet
ARTchix studio 5 ECO blank ATC's. you can also use the ECO blanks that are in the 'packaging' with the whales and anchors and the tiny windows, so you are really getting 8 blank ATC's to create with. 
VIVA decor glitter paste
VIVA decor inca gold - platinum
TCW "mini damask" template
12" blue roses ribbon
10" clear newspaper print film
2 sheets of old encyclopedia book
my creative creations buttons
2 metal butterflies
2 playing cards

as you can see the possibilities are endless! and these is also an AMAZING paper add on with matching colors and coordinating products!

so make sure to visit FROG DOG STUDIO blog on august 22nd and august 29th to see what i made with this beautiful kit!

or why wait - head over there right now for some great inspiration from TINA's design team.

hugs 'n smiles,
Emmy

Thursday, August 1

simple pleasures {7 dots studio & PAPERHAUS}

hello scrappy friends!

it's the 1st of the month and it is time for the monthly sketch at the PAPRHAUS magazine:


and here is the awesome sketch designed by the very talented JULES:


this week the PAPERHAUS magazine is featuring 7 dots studio and we - the design team - had the pleasure to work with their amazing products. 

for my layout i used the sweet 7 dots studio collection "hopefully" - 


and here are some close ups and detailed explanation on how i did it.

i started with white cardstock, which i altered with THE CRAFTER'S WORKSHOP "chevron arrows" template and modeling paste. when the paste was dry i stamped ink spots using BOBUNNY mixed media stamp set. 


then i cut a  15 x 29 cm piece of "LOVE ME" pattern paper and used it as a basic layer for my pictures. 

the chevron chippies are from SCRAPMATTS. i altered them with brown embossing powder. 


to decorate my page further i used another masking template - from DONNA DOWNEY - on the pink pattern paper. i cut the yellow half-circle using HEARTFELT CREATIONS layered scalloped posy die.


the mini roses are from PRIMA marketing and the pearls are from FLOURISH WITH A BLING.


all of the flowers on this layout are from PRIMA marketing. i used DONNA DOWNEY poppies and peonies yellow and other blooms. the title chippie - simple pleasures - is also from SCRAPMATTS - scrapwords 06.


the various words and phrases are from the sticker sheets, matching the 7 dots paper collection.


i hope you enjoyed today's post!

don't forget to jump to the PAPERHAUS blog to see more inspiring project and to play at our monthly sketch challenge!

hugs 'n smiles,
Emmy

Wednesday, July 31

die-versions late July 2013 release

hello scrappy friends! 

it is time for the DIE-VERSIONS' late july 2013 release - "BOYS WILL BE BOYS"!


twenty-four new dies, perfect for all little / big, snips and snails, and puppy dogs tails boys!

and don't forget to watch our "DV details" short little videos, featuring one die, and only one die, at a time. 


all of these "DV details" videos can be seen on our DIE-VERSIONS crafting youtube channel, but they will also be linked here on the blog. 

feel free to share these videos, send them to friends and scrapping buddies, or post them on your local scrapbook store's facebook page and say "i want these!!" :-) 

have a great week!

hugs 'n smiles,
Emmy

Tuesday, July 30

paper flowers using GELATOS and tissue paper {FABER-CASTELL}

hello crafty friends!

it is my turn today at FABER-CASTELL design memory craft blog today and i've prepared a short tutorial for you - how to create flowers using tissue paper and design memory craft GELATOS®.

here is a sneak peek of my project:


and this month we've got a special threat for you - FABER-CASTELL design memory craft is featuring JUSTRITE stamps on the blog daily.

the full post, a detailed tutorial and product description you can find on FABER-CASTELL design memory craft blog!

hugs 'n smiles,
Emmy

Friday, July 19

color combo challenge #248

hello crafty friends! 

the new color combo #248 is LIVE! the colors this week are pistachio - taupe - soft blue - light grey - peach and here is what i came up with -

"your SMILE" 


 i based my layout on color combo #248: sweet serenity 


 i used all five colours from the colour palette on my page. my creative boost came from inspiration photo #1: focus on product: twine {wrapped twine around the layout}. other inspiration: inspiration photo #3: various clocks and punched paper edges edges (idea: the clock and the filigree silver edge); inspiration photo #4: banners and buttons {idea: green banner and small buttons}; inspiration photo #2: different sized cogs {idea: flowers}. 

and here are some close ups from my project: 

i started with a white cardstock, PRIMA marketing "clocks" 12x12" stenciled mask and modeling paste.


after the paste has dried, i used light grey PANPASTELS to colour the dimensional clocks. i cut of 1cm from each side of the white cardstock, distressed the edges with TIM HOLTZ' "broken china" ink pad and layered it on green pattern paper. 


i used WEBSTER'S PAGES "new beginnings" collection. the designs are amazing and i could embellish my page just by fussy cutting the cute elements from the pattern papers.


the amazing chippie is from WORDS or WHATEVER "clock and gear corner". i covered the clock with embossing powder first to create the distressed look and then i coloured the chippie with distress ink.


i cut the cogs from cardstock using TIM HOLTZ' "movers and shapers cogs" die. i colored them with distress ink "broken china" and "shabby shutters'.


for the title i used pattern paper and WEBSTER'S PAGES alphabet stickers.


thank you for joining me today!

and don't forget the deadline for this colour combo is july 28th, 2013. for more detailed information, visit COLOR COMBOS GALORE website.
i hope you will join us at CCG!

hugs 'n smiles,
Emmy