Wednesday, December 28

cute & dandy {DT work for heartfelt creations}

hello scrappy friends!

it's wednesday and it is time for another HEARTFELT PROJECT from me!

this time i got to work with the amazingly ADORABLE rylan quinn. just look at his picture - he looks so CUTE and DANDY:


heartfelt creations products i used in this layout:

Other products used: BoBunny “Et Cetera” – Geography and “Time Piece”; K & Company “Life’s Journey”; Martha Stewart “Iron gate” and “Stars” edge punches; Prima Marketing “Say it in Pearls”, Tattered Angels “Tattered Traveler” glimmer screens; Tim Holtz “Tea Die” Distress Ink and applicator; FaberCastell brown brush pen; Scrap Works “Flea Market” Cardstock Stickers; “Starburst” punch;

i started by preparing my background. i used tattered angles "TATTERED TRAVELLER" glimmer screens, tim holtz "tea die" distress ink and faber-castell brown brush pen. for a step-by step tutorial on how to create a tailor-made background, click HERE.

after i finished my background, i cut a 13,5 x 18,5 cm rectangle from a blue pattern paper and i glued it under the picture. i cut a 14 x 23 cm pattern paper stripe and punch the long edges with martha stewart "iron gate" edge punch. the two stripes from blue paper are punched with martha stewart “stars” edge punch.

i used the HC decorative lace border die and brown cardstock to create some decorative elements on my layout. for my embellishments i used different pattern papers - BOBUNNY "time piece" for the clocks; K & COMPANY for the tickets and the dictionary stripes. i cut two fancy corners with HC decorative butterfly / border die and added them to my layout.


the flowers - i stamped various sizes blossoms on pattern papers with brown ink. then, i punched few starburst flakes and shaped the different layers. i added 3d foam tape under some of the petals to create dimension on my page. for a complete tutorial with close ups, please click HERE.


i stamped few flourishes with leaves and small leaves from HC leaf medley stamp set on a pattern paper, cut them out and shaped them with embossing pen. 

the title is made with brown cardstock alphabet.


i stamped a sentiment from HC classic message precut set on a blue pattern paper; distressed the edges and glued it above the picture.


to finish off my page, i added word brads and pearls.

i hope you enjoyed today's post!

hugs 'n smiles,
Emmy


Monday, December 26

kaboodle doodles challenge #99

hello lovely friends!

it's a KABOODLE DOODLES monday again and we have a new challenge for you.

thanks so much to everyone who played along in last week's challenge. we all loved seeing your wonderful creations! be sure to check KABOODLE DOODLES' blog tomorrow to see who our winner is and who has been chosen to be in our TOP 3!

this week the challenge theme is ANGELS or FAIRIES.

and here is some inspiration from me:


i used the "angel girl" digi stamp from JELLYPARK.

if you wish to see the wonderful examples from the rest of the design team, please visit the KABOODLE DOODLES' blog.

this week's sponsor is brand new - JELLYPARK digi images.


JELLYPARK digi images are the creation of talented artist CLAIRE KEAY who works out her home studio in essex, UK. you may recognize claire's whimsical illustrations from my favorite things line of clear stamps that she designs or from a large number of childrens' books that she has illustrated. we are so pleased to have JELLYPARK sponsoring us this week! prize will be 2 images of choice from JELLYPARK SHOP!!

so, grab your colouring pencils and start creating!

your projects need to be posted on kaboodle doodles' blog by sunday, january 1st and the winners will be announced on tuesday, january 3rd.

hugs 'n smiles,
Emmy

Friday, December 23

flower tutorial using the hc flora grande precut sets - part II

good evening crafty friends!

few weeks ago i published a tutorial on how to create a paper flower with heartfelt creations flora grande precut sets. today, i'm adding a little twist to it - just keep reading:-)

here is a list of what you will need to make such flowers:
HCPC 3375 flora grande 1 precut set
HCPC 3374 flora grande 2 precut set
"starburst" punch
brown ink pad
brads
3d foam tape
double sided adhesive tape

step 1: stamp 3 different sized floral designs; cut the images by hand or you can use the blossom 3 nestabilities die from spellbinders.


step 2: separate the individual petals;


step 3: punch 3 or more starburst shapes; curl the petals down {i used my pencil for the large flowers and a barbecue stick for the smaller ones - i'm sure that there are better tools, but just didn't have anything at home}; curl the rays of the starburst shape up:


step 4: turn your flowers and add 3d foam squares under the petals;


step 5: make a hole in the middle and put the brad through all of the different layers; the end result should be something like this:


i hope this tutorial was useful to you!

the coming wednesday i'll be sharing the layout i used these beauties on, so stay tuned:-)

MERRY CHRISTMAS!

have a magical CHRISTMAS {away from paper and scissors:-)} and wonderful NEW YEAR!

hugs 'n smiles,
Emmy

how to create a hand-made background in 3 steps

hello crafty friends,

today i played with my papers {as usual} and i just wanted to share my latest passion with you - tailor made backgrounds. so, this tutorial is about how to create a tailor-made background in 3 easy steps.

step 1: for this step you will need a white sheet of cardstock, tim holtz distress ink pad "tea die" and applicator, and tattered angels "tattered traveler" glimmer screens. take the compass shape and stick it on your cardstock, so it won't move. make sure to put the sticky tape on a place, which will be covered with embellishments later.

begin inking around and on top of the screen. you can put as many layers of ink as you want until you reach the colour you need.


you can repeat the same technique as many time as you like.

step 2: you will need a pencil, a ruler, and eraser and a background stamp {i used heartfelt creations "large elegant word background precut set"}. draw a frame in the middle of your background and stamp the image you chose. allow the ink to dry and erase the pencil lines.


step 3: you will need a marker and a ruler. to finish off my tailor-made background paper i decided to add a frame around it. i used a brown brush pen from faber castell. 


i hope you enjoyed this little tutorial of mine! the creation process is not longer than 10 min and the possibilities are endless!

hugs 'n smiles,
Emmy

Wednesday, December 21

holiday ANGEL {DT work for heartfelt creations}

hello scrappy friends!

only few day until CHRISTMAS and I can honestly day that I can't wait:-) our christmas tree is decorated, we've planned a party, we've invited our friends, we've wrapped the presents and the only thing we have to do is count the days:-)

so here is another christmas project from me, made with the MAGICAL heartfelt creations products - 

holiday ANGEL:


heartfelt creations products used:
HCPC 2292 regal poinsettia 1 precut set
HCPC 2291 regal poinsettia 2 precut set
HCPC 3435 feather grass flourish precut set
HCD 702 decorative butterfly / border die

first i prepared my background paper. i used the large and the corner flourish from the HC feather grass flourish precut set to create the stamped frame around the edge of the paper. with a white pen i drew a pattern on top of the stamped border. i added gesso to the middle area of the background paper and to the edges of my picture to give it vintage christmassy look.

while waiting for the gresso to dry, i cut a 21 x 21 cm square from striped pattern paper and punch the edges with an edge punch. i cut two curly borders from brown cardstock with the HC decorative butterfly / border die. from a different pattern paper i cut two rectangles and i drew a white frame around their edges.

for my poinsettias i used the HC regal poinsettia 1 and 2 precut sets. to view my step-by-step tutorial on how to create the poinsettias, click HERE.


i stamped the poinsettia leaves (small and large) on a green pattern paper, repeat the stamped leaves with white pen and cut them out. positioned them around the flowers and glue them on the layout. i added some of the matching paper tags and dimensional sticker phrases.


for the title i used the letters from making memories “fa la la la” sticker alphabet. to finish off my layout i outlined the letters with white pen.


and because it is CHRISTMAS HEARTFELT CREATIONS have another fabulous giveaway:
as a thank you to our very loyal HC customers, heartfelt creations will be giving away 50 - $50 dollar gift certificates today, wednesday, december 21, 2011 at 9PM EST. you can follow this link: http://www.heartfeltcreations.us/getmygift/ once registration opens to get your certificate. make sure you're available at that time. they will be snatched up quickly!

and a quick reminder - there are new limited edition stamps added to our limited edition section this week; so make sure you get them before they are gone forever!

hugs 'n smiles,
Emmy

Monday, December 19

kaboodle doodles challenge #98

hello lovely friends!

it's monday again and we have another AMAZING challenge at kaboodle doodles for you!

this week the theme is "oh, christmas tree, oh christmas tree!". so, all you have to do is create a card or a layout with a christmas tree on it or any type of christmas tree decoration.

here is some inspiration from me:


i used marianne design "songbook" and "traditional christmas" pretty papers pads and rayher christmas ribbon.

for more inspirational projects from our design team, you can click HERE.

the winner this week will receive $10 voucher from di's digi downloads:


remember - your projects need to be posted by sunday, december 25 under the challenge post on kaboodle doodles blog. the winners will be announced on tuesday, december 27. 

so, grab your christmas mojo and show us your christmas trees!

hugs 'n smiles,
Emmy

Sunday, December 18

the meaning of christmas {OUAS}

happy SUNDAY everybody:-)

just a quick post today featuring my latest layout "the meaning of christmas". this layout is inspired by the december 15 challenge at once upon a sketch. the challenge this time is to create an "our christmas traditions" themed layout and you have to use the WONDERFUL sketch from the very talented nadia cannizzo:


here is what i came up with:


i named my layout "the meaning of christmas", because going away for the holidays has become a family tradition for us.

so far, we've been to:
hurgada, egypt {2004}
punta cana, dominican republic {2005}
agadir, morocco {2007}
sharm-el-sheikh, egypt {2008}
sofia, bulgaria {2009}
cruise in the mediterranean {2010}

this year we are going again cruising in the mediterranean. last year we visited nice, tunis, rome, malta, bari and olympia. this year we are going to venice, bari, rhodos, haifa, jerusalem, athens and back to venice. i just have to be patient for a few more days:-)

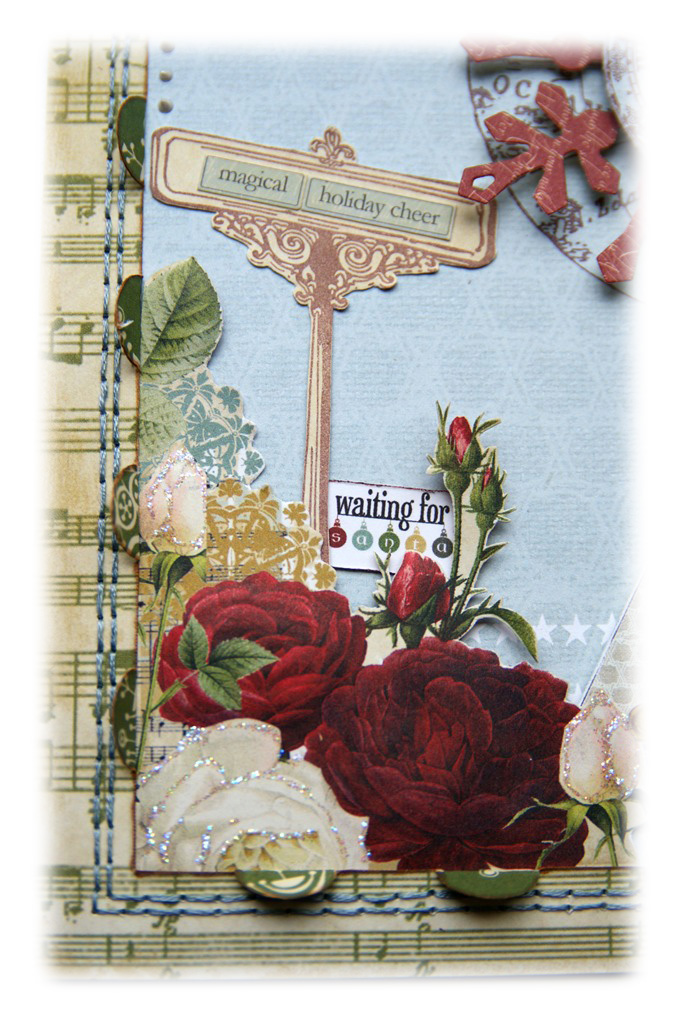
back to my layout - to combine christmas with travel, i used two collections from webster's pages "yacht club" and "waiting for SANTA". 

i did a lot of fussy cutting, stitching, stamping and glittering. 


i used one of the "waiting for SANTA" journalling cards {after altering it} for my journalling spot. i wrote the places where the pictures were taken and the year we've been there.


the SANTA air balloon is from the mini papers; the other one i stamped with "time traveler" stamp set from tattered angels.

i tried to combine CHRISTMAS with travel by using spellbinders' "snowflake pendant 2010" die and stamps from the "time traveler" set.


the board is stamped with the tattered angels set; the words are from the CHRISTMAS cardstocks stickers matching webster's pages "waiting for SANTA" collection.


some more close ups:


i hope you enjoyed today's post!

have a creative SUNDAY! 


hugs 'n smiles,
Emmy